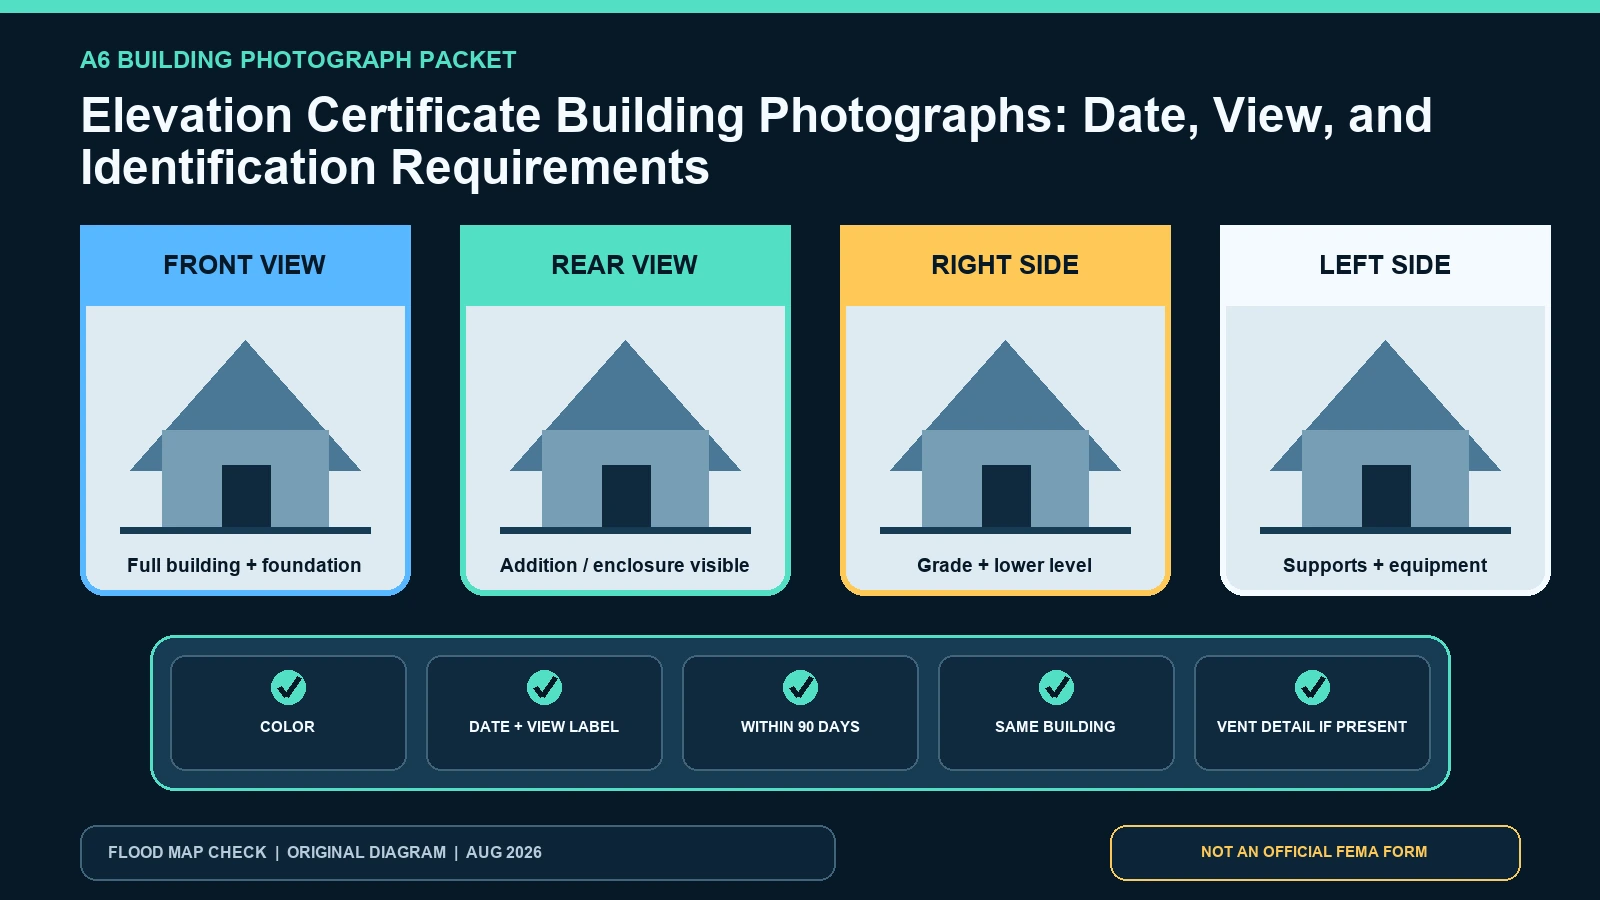
A FEMA Elevation Certificate photo packet should contain at least two-and when possible four-clear color photographs taken within 90 days of certification, showing the building’s sides and foundation. FEMA’s form instructions for Item A6 say the views must confirm the building description and the Building Diagram selected in A7. Label each image with its date and view. When flood openings or vents apply, include a close-up of a representative opening.
Last checked: August 7, 2026.
The photographs are identification and construction-evidence attachments; they do not certify an elevation. A technically sharp image can still fail if it shows the wrong structure, hides the foundation, predates exterior work, or cannot be tied to the certificate address. Build the packet as a reproducible record: structure identity, date, direction, full-building context, foundation detail, opening detail, and file integrity.
Start with the building the certificate actually describes
Stand at the property and match A2, A3, A4, and A7 before taking pictures. On a multi-building parcel, decide which house, accessory building, condominium building, addition, or manufactured home the certificate covers. Photograph a permanent address or building identifier when it is visible without exposing private information. If the street number is absent or shared, add a parcel sketch or site plan that points to the certified structure.
Do not rely on photo order alone. File names and captions should repeat a short structure identifier and view: `Bldg-A_front_2026-08-07.jpg`, not `IMG_4431.jpg`. The form’s photograph pages carry the building street address, city, state, and ZIP, which should agree with Section A. If the structure is a rowhouse and side views are physically impossible, explain that limitation and provide the clearest available front and rear context rather than inventing a view.
| Photo element | Minimum evidence | Mismatch to catch | Fix before submission |
|---|---|---|---|
| Front view | Entire front and visible foundation, labeled date and Front View | Wrong unit, cropped foundation, vehicle blocks grade | Retake from a wider or offset position |
| Rear view | Entire rear and foundation relationship | Addition or enclosure absent from front view | Include rear context and a detail of altered area |
| Right and left views | When possible, both sides showing grade, supports and levels | Split-level or multi-level form cannot be read | Add both side views and identify orientation |
| Flood-opening close-up | Representative vent/opening plus enough context to locate it | Cover, grille or opening cannot be matched to A8/A9 | Add a context shot and readable model/document reference when relevant |
| Identification | Address/building label or site-plan reference | Photos belong to a neighboring or secondary structure | Cross-reference every caption to one building ID |
| Date | Capture date within 90 days of certification | Old listing photo or edited screenshot | Retake and preserve original file metadata |
Use the 90-day rule as a condition check, not just a timestamp
FEMA’s instructions link the photos to the date of certification because they are meant to show the building described by the form near the time it is certified. Record the actual capture date, not the date a picture was downloaded, exported, or added to the PDF. If construction, grading, an enclosure, equipment location, stairs, deck, or flood vents change between photography and signature, take new photographs even when the old set remains inside the 90-day window.
A screenshot of online imagery is not equivalent to a current field photograph. It may be months or years old, have uncertain capture dates, blur the foundation, or show pre-construction conditions. If safety or access prevents a required view, document the obstruction, contact the local official or receiving insurer, and ask what alternate evidence it will accept. Do not label an aerial or street-view capture as a certifier-taken building photo.
Show enough foundation to support the building diagram
The selected Building Diagram determines which physical elevations are reported in C2. The full-building views should therefore make the foundation type and lower areas understandable: slab on grade, basement, crawlspace, piers, posts, piles, columns, enclosure, or multiple levels. Avoid tight facade photographs that cut off the grade, bottom floor, supports, stairs, or lower enclosure. When vegetation, stored material, skirting, snow, or temporary barriers hide those features, clear the view safely or explain the obstruction.
Photographs do not replace field measurements, but they can expose inconsistencies. A7 might show an elevated building while the pictures reveal a full enclosure; A8 might report flood openings while no opening is visible; C2.e might describe machinery on an exterior platform that the relevant side view omits. Flag the conflict for the certifier. Do not select a diagram or calculate an elevation from appearance alone.
Document flood openings without turning the packet into a product advertisement
When A8 or A9 reports flood openings, include at least one clear close-up of a representative opening or vent, as FEMA instructs. Pair it with a wider image that shows which wall or garage it belongs to. Capture the opening, nearby grade, and any cover or obstruction. If the certificate treats an opening as engineered, the photograph does not substitute for the required certification or evaluation documentation and manufacturer/model information.
Do not count openings from the photograph unless the certifier can verify the entire enclosure and the height criteria. A close-up may hide that several vents are above the allowed grade relationship, blocked, or installed on only one side. The photo should support the recorded condition, while A8/A9 measurements and attachments provide the technical evidence.
| Official record | Use it to verify | Record this evidence | What it cannot decide |
|---|---|---|---|
| FEMA EC Item A6 instructions | Photo count, 90-day timing, color, views, foundation and opening detail | Form edition, capture dates, view labels and photo-page address | Surveyed elevations or current safety |
| FEMA Elevation Certificates page | Purpose and official access path for the EC | Page date and linked form route | Local supplemental photo requirements |
| FEMA Map Service Center | Map context to identify the property and panel | Address result, panel and map date | Which structure on a parcel the photos depict |
| Local floodplain administrator or insurer | Additional views, format and submission requirements | Request date, response and recipient | The accuracy of a professional elevation |
Package the image files so another reviewer can audit them
Keep the original color files and create submission copies without stripping the visual information. Record file name, capture date, photographer, view, building identifier, short description, original pixel dimensions, and checksum when chain of custody matters. Captions should say what the reviewer should see, such as “Rear View-enclosure wall and representative flood opening; taken August 7, 2026,” rather than “house photo.”
| File-control field | Example | Why it matters | Do not substitute |
|---|---|---|---|
| Structure ID | Parcel 17 / Building A | Prevents cross-building mix-up | Owner surname alone |
| View label | Front, Rear, Right, Left, opening detail | Connects image to FEMA photo-page instruction | File sequence number |
| Capture date | 2026-08-07 | Tests 90-day relationship to certification | Upload or export date |
| Condition note | Foundation visible; lower wall partly screened by shrub | Makes limits explicit | A blanket “clear” label |
| Original file | Read-only full-resolution color image | Supports later authenticity and detail review | Messaging-app thumbnail |
| Packet page | Page 7 Photo One / separate attachment 3 | Keeps comments and attachments retrievable | Loose unlabeled print |
If a PDF compressor makes labels unreadable or turns dark foundation areas into solid blocks, retain a higher-quality attachment. Verify the final PDF page, not just the original JPEG. Make sure no image is rotated, stretched, duplicated, or placed under the wrong caption. Privacy edits must not cover the foundation, address evidence needed for identification, or relevant building features.
Reject these photo packets before they reach the reviewer
- Only one facade is shown even though the other sides were accessible.
- The foundation, grade, lower enclosure, or supports are cropped out.
- Images were taken more than 90 days before certification or the capture date is unknown.
- The certificate address and photo-page address differ, or the parcel contains several unmatched structures.
- A vent close-up has no context showing where it is installed.
- Construction or exterior grade changed after the photographs were taken.
- A listing photo, map screenshot, or image of another building was inserted as current field evidence.
- The final PDF makes captions, dates, or physical features unreadable.
When a defect is found, state the exact missing view or identity link. “Photos incomplete” causes another round of guesswork. “Retake the left side to show the crawlspace floor relationship and label it with capture date and Building A” is actionable.
What photographs cannot certify
Building photographs cannot establish the elevation of a floor, grade, machinery platform, or structural member. They do not prove that flood openings meet performance requirements, that the building complies with an ordinance, that a map zone is correct, that construction remained unchanged after the images, or that insurance coverage or a premium is guaranteed. They support identity and visual interpretation of the form.
Use the Elevation Certificate source guide to keep photos with all referenced attachments. Use the FIRM and FIS guide only for map context; a FIRMette is not a building photograph. If the lender’s determination conflicts with the property identity, review the flood determination record separately.
Questions about difficult photo situations
Are two photographs always enough?
Two are the minimum in FEMA’s instructions, while four are requested when possible. Split-level, multi-level, enclosed, or otherwise complex buildings often need side and detail views to support the description and diagram.
Can photographs be added after the form is signed?
Ask the certifier and receiving party. Added images must still identify the same certified condition, fall within the timing requirement, and remain tied to the complete packet without implying the signer reviewed evidence they did not review.
Do photos have to show private occupants or interiors?
No. The EC instruction focuses on exterior building sides, foundation and representative flood openings. Avoid people, vehicle plates, personal papers, and unrelated private details.
A photo packet should make the building unmistakable
Capture current color views, identify one structure, show the foundation and lower building condition, label date and direction, add representative opening detail when applicable, and inspect the final PDF for clarity. The packet should allow a reviewer to connect A2-A9 and A7 to the same visible building without treating appearance as a survey. FEMA source scope was checked August 7, 2026; reopen the posted form before the certification session in case its photo instructions change.